Write Value To Data Table Step
The Write Value To Data Table step changes a specific cell inside a data table variable that already exists. You use it to change the value at a chosen column and row.
How to Use Write Value To Data Table
Use this step to change data stored in a data table while your automation runs.
Step 1: Add the Step to Your Process
- Drag and drop the Write Value To Data Table step into your process.
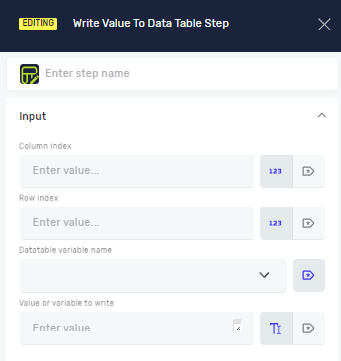
Step 2: Set Up the Step
- Datatable variable name: Pick the data table variable you want to change.
- Column Index: Type the number for the column you want to update. You can use a variable or a direct number.
- Row Index: Type the number for the row you want to update. You can use a variable or a direct number.
- Value or variable to write: Give the new value or pick a variable whose value you want to put into the cell.
Important: Column and row numbers usually start at 0.
What the Settings Mean
Step name (Optional)
- A custom name for this step. This helps you find it in your process.
Column Index (Required)
- The number for the column where you want to write the value.
- Example:
0for the first column,1for the second. - Use a variable if the column number changes.
Row Index (Required)
- The number for the row where you want to write the value.
- Example:
0for the first row,1for the second. - Use a variable if the row number changes.
Datatable variable name (Required)
- The name of the data table variable you are changing.
- Example:
myDataTable - This must be a variable that already exists and is of the "Datatable" type.
Value or variable to write (Required)
- The data you want to put into the cell.
- Example:
"New Text",123, or a variable likemyStringVariable.
Related Articles
Need Help?
Can't find what you're looking for? Join the Robotiq Community to get help from other users and the Robotiq team.