Steps overview
Steps are the individual actions that make up a Robotiq.ai automation process. Each step does a specific task. You combine steps to build complete workflows.
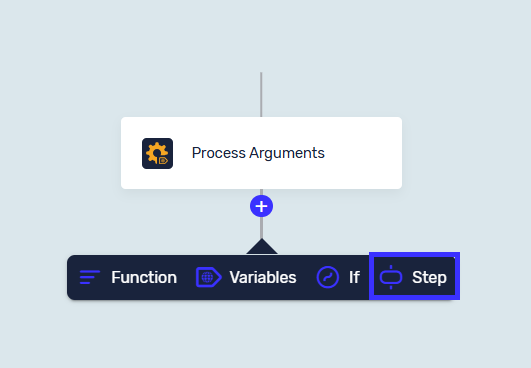
How to Add a Step
- Go to the process editor page.
- Click the "+" button.
- Select "Step".
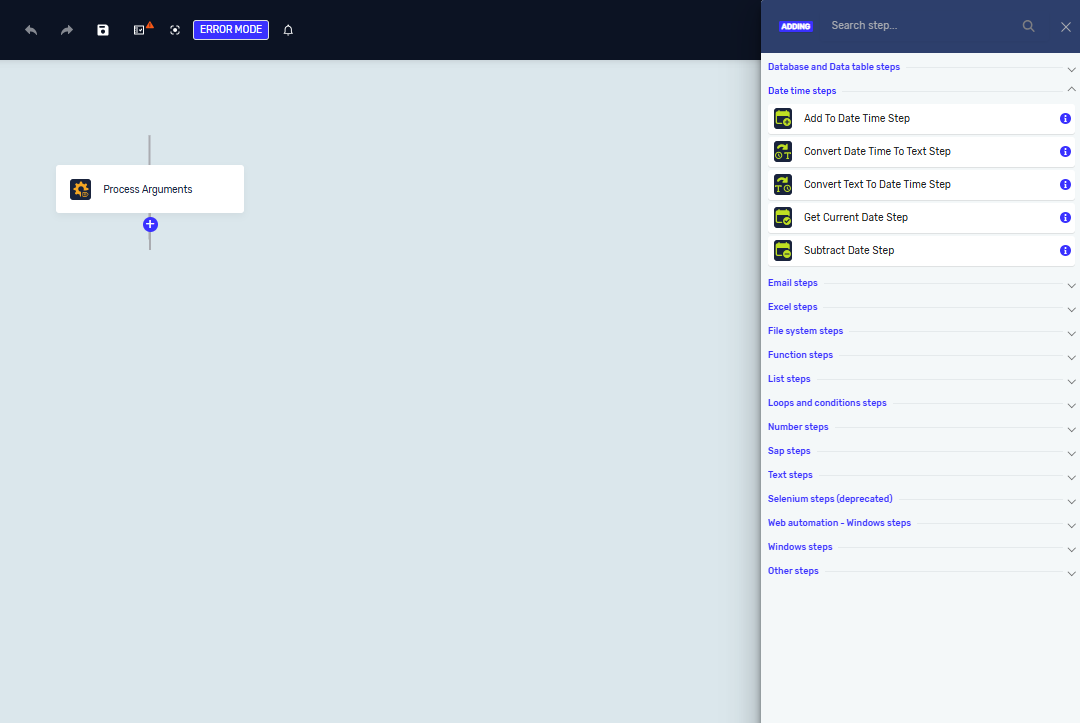
- In the "Search" bar, type the step name or find it in the view bar.
Tip: Each step has an info button. Click it to see documentation for that specific step.
Step Categories
Robotiq.ai puts steps into groups based on what they do:
- Text
- Lists
- Numbers
- Date and Time
- Loops & Conditions
- Excel, Database, and Datatable
- Web Browser
- Windows
- File System
- Functions
- Other steps
Variable Naming Convention
A valid variable name must begin with a letter (a–z, A–Z) or an underscore (_). It may contain only letters, digits, or underscores. Additionally, it must not be a reserved keyword in Python or C# such as class, return, True, public, while, new, ...

Step Options
You can manage individual steps or groups of steps in the process editor.
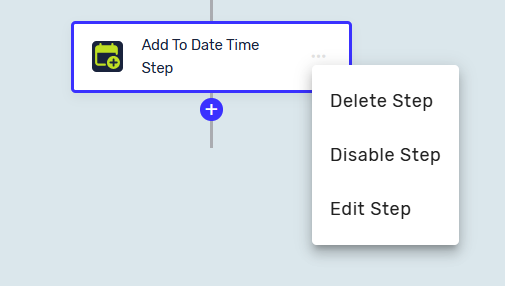
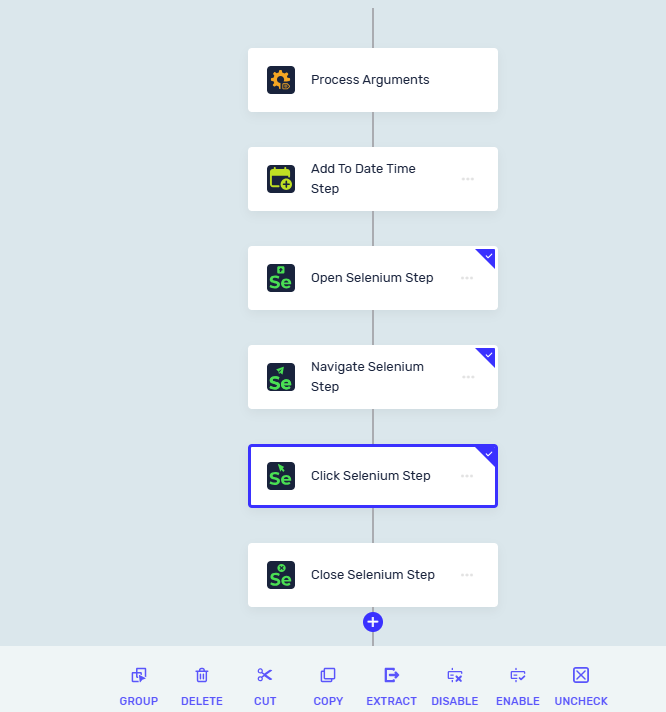
Individual Step Options
Click the three dots on a step to see these options:
- Delete step: Removes the step and its information from the process.
- Disable step: Temporarily turns off the step when the process runs. This helps when testing specific parts of your code.
- Edit step: Opens the step editor to change settings and information. You can also right-click a step to open this editor.
Multiple Step Options
Select one or more steps by clicking the top right corner of each step. Then choose from these options:
- Group steps: Puts selected steps into a group to make them easier to see.
- Delete steps: Removes all selected steps.
- Cut steps: Removes selected steps and copies them to the clipboard.
- Copy steps: Copies selected steps to the clipboard.
- Extract to Function: Saves selected steps as a function you can use again. You can then use this function in other processes within your Headquarters.
- Uncheck all steps: Deselects all currently selected steps.
Related Articles
Need Help?
Can't find what you're looking for? Join the Robotiq Community to get help from other users and the Robotiq team.