
Instructions for Verifying Network and System Requirements
This article shows you how to check if your Virtual Machine (VM) meets the network and system requirements for a Robotiq.ai setup. This helps make sure your Robotiq.ai Robot can talk to other systems and run well.
What You'll Need
- Access to your Virtual Machine (VM)
- Admin rights on the VM
- Command Prompt or PowerShell access
How to Check Network Requirements
Step 1: Check Connection to HQ Server
Make sure your VM can reach the Robotiq.ai HQ server (IP: 51.137.207.0).
- Check Port 443 (HTTPS): The HQ server needs to be reachable on port 443.
Run a Ping Test: Open Command Prompt and type: ping api.robotiq.ai

Step 2: Check Local TCP Communication
Make sure no firewall or network settings block these local ports:
- Port 32788: Used by the Credential Provider.
Port Range 0-65535: Used by the Handler for communication.
Check Port Status: Open Command Prompt and type: netstat -an | findstr "32788"
The output should show the port as LISTENING.

Step 3: Check HTTPS Communication on Port 443
Confirm your VM can make secure connections over port 443.
List Connections on Port 443: Open Command Prompt and type: netstat -an | findstr ":443"
Look for ESTABLISHED connections in the output. This means HTTPS communication with outside servers is working.

How to Check System Requirements
Step 1: Check Hardware and Software Specifications
Make sure your VM meets these minimum specs:
- Processor: Intel Core i7-3770 or better
- Memory: 8 GB RAM or more
- Disk Space: At least 100 GB
Screen Resolution: Set to 1920 x 1080 by default
Use System Information Tool: Search for "System Information" in the Windows search bar and open the app to see your VM's specs.
How to Set Up Proxy Settings
Step 1: Check Current Proxy Settings
- View Proxy Configuration: Open Command Prompt and type:
netsh winhttp show proxy

Step 2: Set Up Environment Variables for HTTPS Proxy
This step is for general system proxy settings.
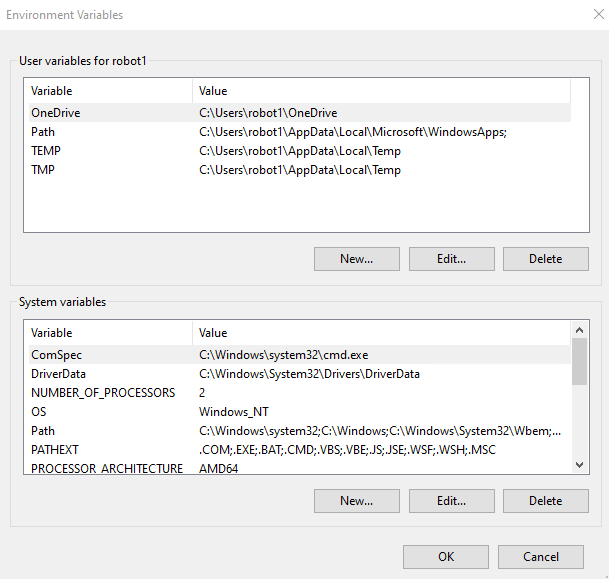
- Open Environment Variables:
- Right-click This PC (or My Computer) and pick Properties.
- Click Advanced system settings.
- In the System Properties window, click Environment Variables.
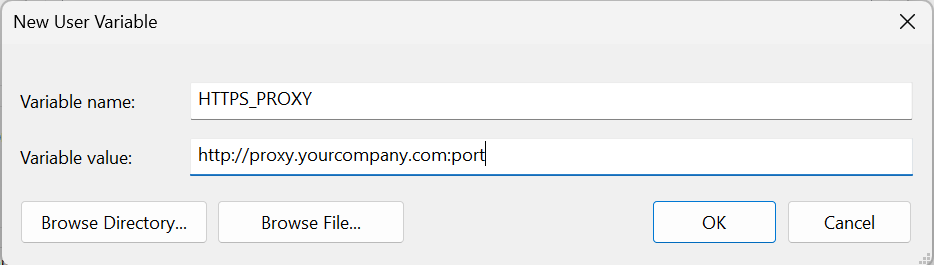
- Add New HTTPS Proxy Variable:
- Under User variables for [user] (or System variables), click New.
- Type
HTTPS_PROXYfor the Variable name. - For Variable value, use one of these formats:
- IP address: http://proxyaddress:port
- Hostname: http://proxy.yourcompany.com:port
Step 3: Set Up Installation Proxy via Windows Registry
This makes sure the Robotiq Robot VM installer uses a specific proxy.
- Open Registry Editor: Search for
regeditin the Windows search bar and open it. - Go to Robotiq Key: Go to
HKEY_LOCAL_MACHINE\SOFTWARE\Robotiq\ - Create or Change Proxy String Value:
- If a
proxystring value isn't there, right-click in the right pane, pick New > String Value, and name itproxy. - Double-click the
proxystring value. - Set its Value data to your proxy address (e.g.,
http://proxy.yourcompany.com:port).
- If a
- Restart Installation: Close Registry Editor and start the Robotiq Robot VM installation again.
Step 4: Use a Load Balancer (Optional)
If you use a load balancer, use its hostname as the proxy address.
Find Load Balancer Hostname: Open Command Prompt and type: nslookup proxy.yourcompany.com (replace proxy.yourcompany.com with your load balancer's hostname)
This command shows the IP address(es) that the hostname points to.
How to Check Admin Privileges
Make sure the local admin account can install software on the VM. The Robotiq.ai software itself doesn't need admin rights to run, but some features might not work as well without them.
How to Turn Off Secure Sign-In (Ctrl+Alt+Del)
You need to turn off Secure Sign-In for the Robot VM.
- Open Local Security Policy: Search for
secpol.mscin the Windows search bar and open it. - Go to Security Options: Go to Local Policies > Security Options.
- Turn on "Do not require CTRL+ALT+DEL": Find
Interactive logon: Do not require CTRL+ALT+DEL. Double-click it and set it to Enabled.
Important: If local settings are locked down, a domain administrator will need to make this change using Group Policy.
How to Check AD Account Configuration
Make sure the Active Directory (AD) account for the robot has these settings:
- Password: Doesn't expire and can't have the special character
;. - Username: No spaces (e.g., "robot1").
- Login Format: If the VM is part of an AD domain, include the domain name with the username when logging in.
- Welcome Messages: Turn off any welcome messages or pop-ups that show up after the robot user logs in.
- Time: Set the system time to default.
Related Articles
- Requirements for robot VM - Robotiq.ai Help Center
- Installation unattended robot - Robotiq.ai Help Center
- Check the username and password
Need Help?
Can't find what you're looking for? Join the Robotiq Community to get help from other users and the Robotiq team.