
Examples of use - Searching images
Algorithm for searching images is used in the new Advanced Click Step and Find Image Step. We will now explain how to use it and how to capture images for its use. Algorithm utilizes anchors to define a region of interest within an image for searching. Anchors are crucial in object detection and image alignment and come in four types:
- Top Anchor: Defines the vertical boundary at the top of the region.
- Left Anchor: Defines the horizontal boundary on the left side of the region.
- Right Anchor: Defines the horizontal boundary on the right side of the region.
- Bottom Anchor: Defines the vertical boundary at the bottom of the region.
Each anchor defines a specific boundary within the image for the robot to search for. You can select only one element and as many anchors as
you want. You can choose some or all of them. It is also allowed to provide multiple images for one type of anchor.
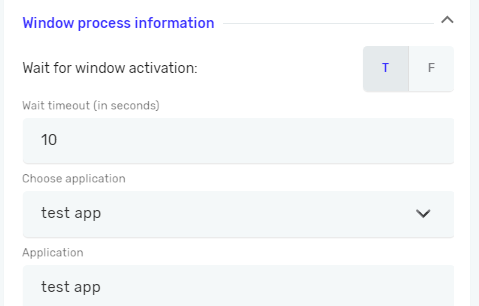
This step has an option to wait for the window to be active, which is set to True by default. We recommend that you provide a timeout period (in sec) for the robot to wait for activation. If you don't specify a timeout and the application is not available (i.e., it cannot be activated), the robot will wait until someone aborts the process, or the robot will abort it after 24 hours by default because processes cannot last more than 24 hours. If you want to find image without using information about the window, it is also possible. Just set the wait for the window to activate to False and leave the fields about the window empty.
If you have an application where the background indicates that a window is active, but the window itself is not yet visible, the "wait for window activation" function will not wait. In such cases, you have the option to specify the number of retries the robot will make while searching for the image. Additionally, you can set the time between each retry in milliseconds if needed. Please note that each attempt of the algorithm lasts a few milliseconds (depending on the number and size of images in this step), and the wait time between retries is fixed at your specified duration. If the robot finds the image on the first try, it will find it and move forward. Retries are only if the image was not found in the previous attempts.
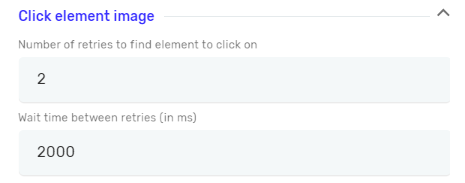
After executing the process with Advanced Click Step or Find Image Step, the log file will display the number of attempts made by the robot, the pause between retries (in our case, it was 2 seconds), and the time of attempt in milliseconds.

The best way to understand how to use an anchor is by using an Excel file. Let's see how to find a specific cell in Excel. As you know, all cells in Excel are the same. Instead of using coordinates, let's use anchors to see how it will change the region of search and find specific cell.
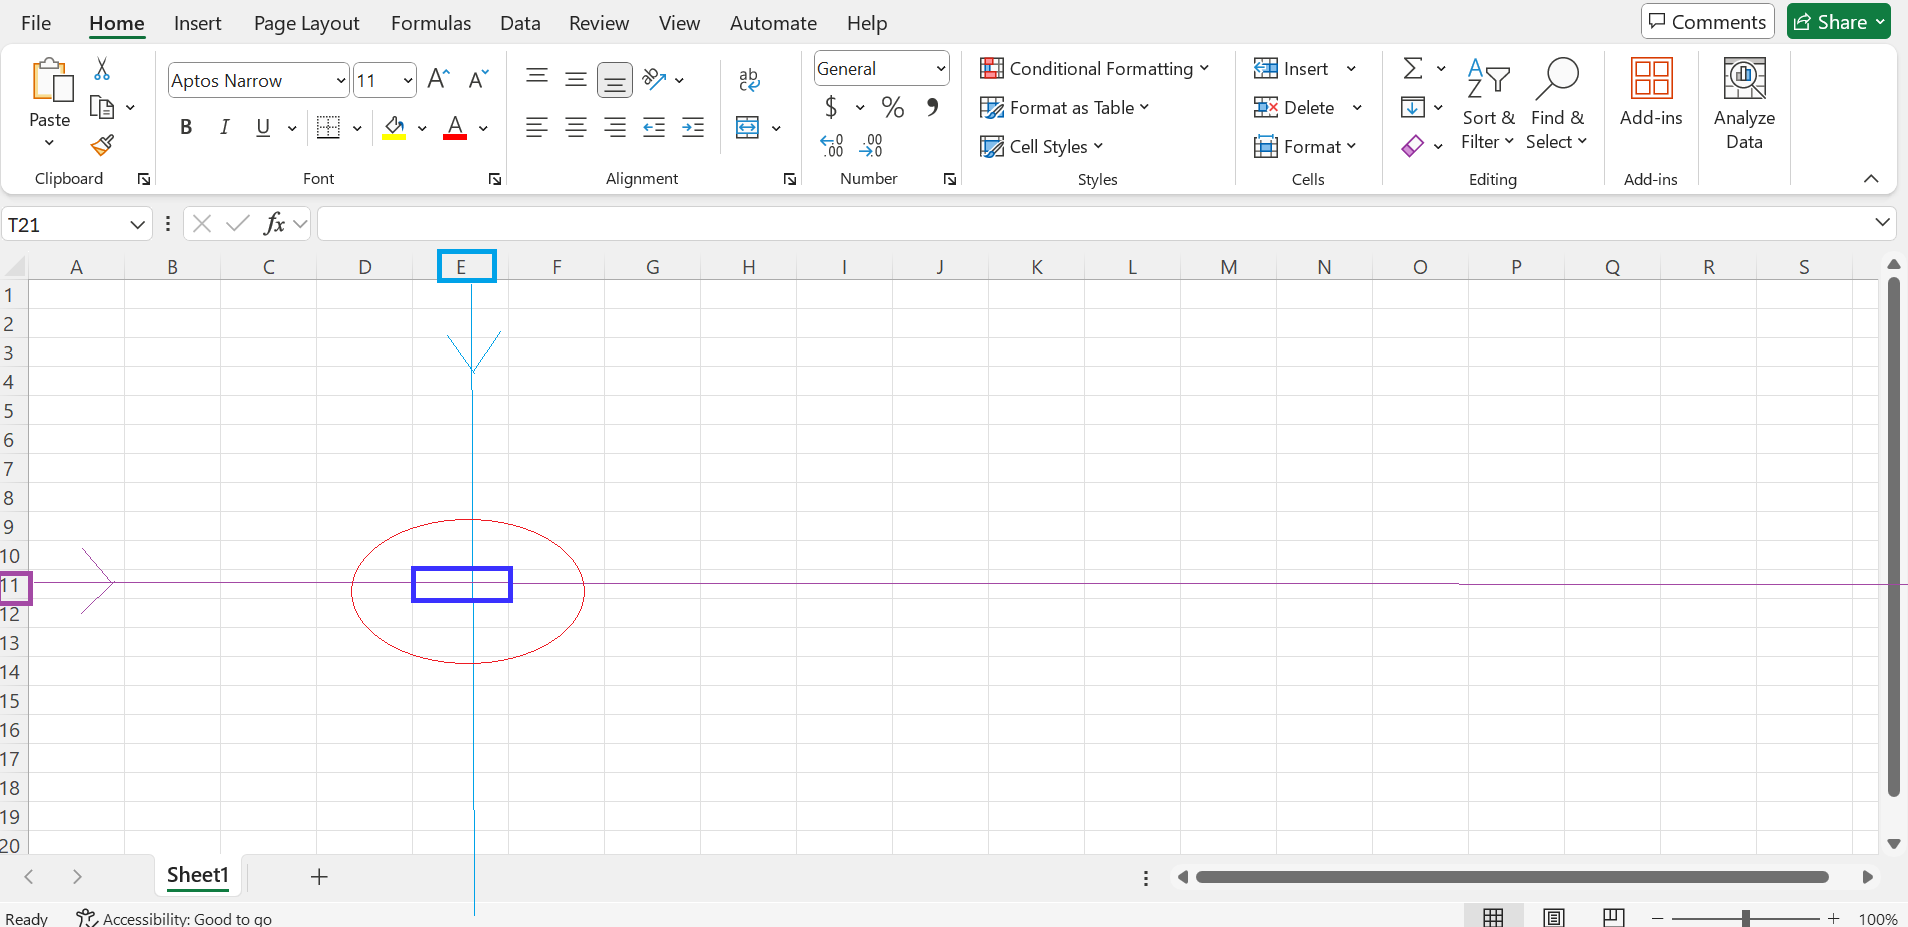
We will now open a new Excel file. Let's see how the robot will find the specific cell E11. As shown in the picture below, if we select cell E11, we can see the top, right, left, and bottom anchors located around this cell.
The Element that we want to find is this:

For the Top anchor, we will choose picture:

For Bottom and Right anchors, there isn't a unique picture that we can select, so we won't add anything there.
Please make sure to use unique anchors for the selected image. That's why we need to select the Left anchor. If we don't, the robot will find all cells in column E (E1, E2, E3, E4, etc.). To findl the exact cell E11, we will select row number 11. For Left anchor, picture that we choose is this:

The images for the element and anchors in the step look like this:
Lets now see how the robot will find anchors and then find the element at the intersection:
NOTE: Avoid using pictures with thick borders. If a picture has thicker borders, it might make it difficult for the robot to identify it. Also, if an application is already in use and certain elements are in focus, it could be challenging for the robot to locate the correct picture as it may closely resemble a different one.
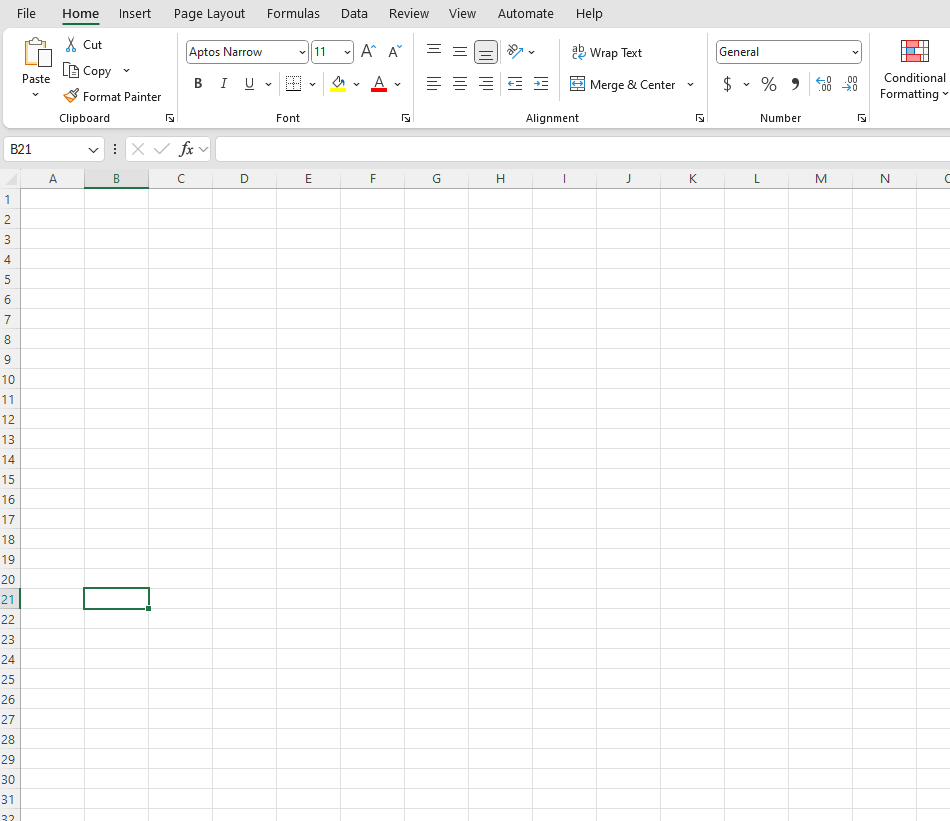
For instance, if the robot clicks on cell B21, the row 21 and column B will have green borders.
Choosing a different left anchor for searching E11 ,for example this:

may result in the robot identifying row 21 instead of 11 due to the strong visual match with the border and the number 1. So the robot may choose this

over this one

Troubleshoot image recognition issue
Additional links: