Stop Process Step
The Stop Process Step immediately stops the robot from running. You can set the final status of the process and add a message to the job log.
How to Use the Stop Process Step
Use this step to control how and when your automation processes end.
Step 1: Add the Stop Process Step
- Drag and drop the Stop Process Step into your workflow in the Process Editor.
Step 2: Set up the Step
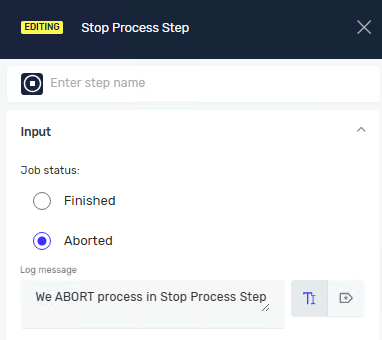
- Click on the Stop Process Step to open its properties.
- Set the Job status and you can also add a Log message.
Parameters Explained
Step Name (Optional)
- A custom name for this step in the Process Editor.
- Example:
Stop on Error - Use this to make your process flow easier to understand.
Job status (Required)
- Sets the final status of the process job.
- Options:
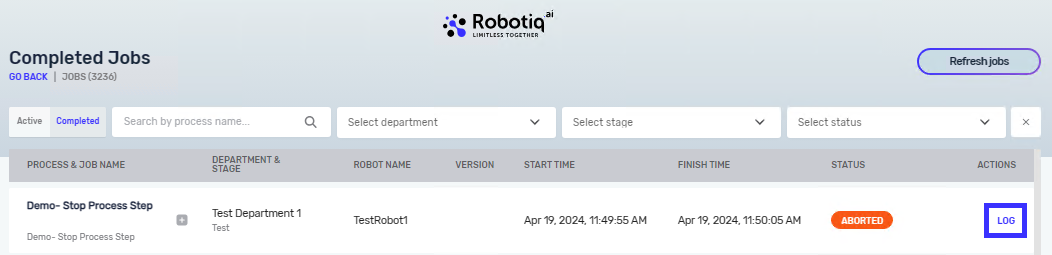
- Finished: The process completed as planned.
- Aborted: The process stopped unexpectedly or because of an error.
- Pick the status that best explains why the process stopped.
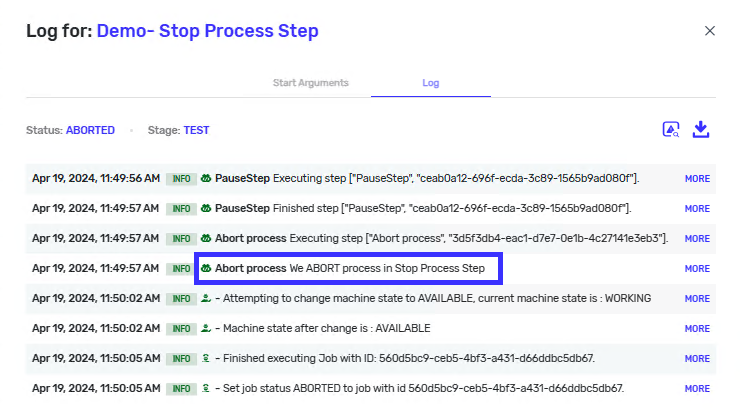
Log message (Optional)
- A message that shows up in the job log file.
- Example:
Process stopped due to invalid input data. - Use this to explain why the process stopped. This helps when you're trying to fix problems or keep an eye on things.
Related Articles
Need Help?
Can't find what you're looking for? Join the Robotiq Community to get help from other users and the Robotiq team.