Save Table Selenium Step
The Save Table Selenium Step takes data from a web table and puts it into a datatable variable. Use this to get organized data from web pages for your automation.
What You'll Need
- A Selenium driver that's set up.
- An open web browser.
How to Use Save Table Selenium Step
This step saves data from a web table into a datatable variable.
Step 1: Add the Save Table Selenium Step
- Drag the Save Table Selenium Step into your workflow.
- Give the step a clear name in the Step Name field.
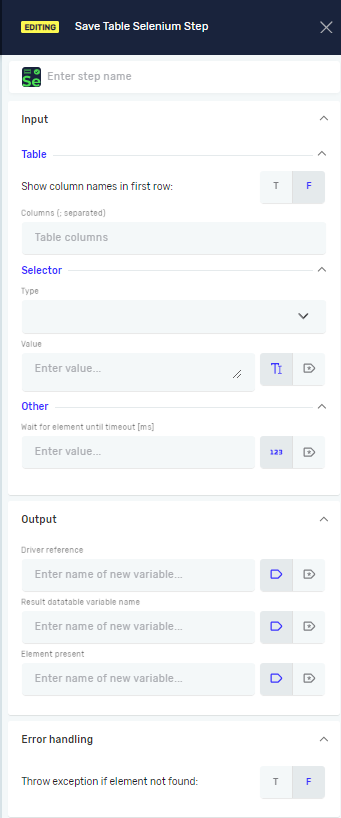
Step 2: Configure Input Parameters
Important: You need to tell the step how to find the web table and how to get the data from it.
Show column names in first row (Required)
- Set to
T(true) if the first row of the web table has column titles. - Set to
F(false) if the first row is data.Fis the default setting.
Columns (Required)
- Type a list of the column names you want to save, separated by commas.
- Example:
Name, Age, City
Selector Type (Required)
- Pick how to find the web table on the page.
- Options include:
- Class Name
- CSS Selector
- Name
- Id
- Link Text
- Partial Link Text
- Tag Name
- XPath
Selector Value (Required)
- Give the specific value for the Selector Type you picked.
- Example: If Selector Type is
Id, type the table's ID (e.g.,myDataTable).
Wait for Element until timeout [ms] (Required)
- Type the longest time in milliseconds the step should wait for the table to show up.
- Use an existing variable or a direct number.
- Example:
10000(waits for 10 seconds)
Step 3: Configure Output Parameters
Driver Reference (Required)
- Type the variable name that holds your active Selenium driver.
Result variable name (Required)
- Give a name for the datatable variable where the table data will be saved.
- Example:
extractedTableData
Element present (Required)
- Assign an existing or new true/false variable.
- This variable will be
Trueif the element was found,Falseif not.
Step 4: Configure Error Handling
Throw exception (Required)
- Set to
T(true) if you want the process to stop and show an error if the step fails. - Set to
F(false) if you want the process to keep going even if the step fails.Fis the default setting.
Related Articles
Need Help?
Can't find what you're looking for? Join the Robotiq Community to get help from other users and the Robotiq team.