Send Email Step
The Send Email Step lets your automation send email messages. You can use it to send notifications, reports, or other information from your automated processes. This step supports multiple recipients, attachments, and both plain text and HTML message formats.
How to Use the Send Email Step
Add the Send Email Step to your process when you need to send an email. You will set up the email server details and message content within the step.
Step 1: Add the Send Email Step
- Open your process in the Process Editor.
- Drag and drop the Send Email Step from the Steps panel into your process flow.
- Click on the step to set its properties.
Step 2: Set Up Email Server Settings
- Enter the Server Name for your SMTP client.
- Enter the Port number for your SMTP server.
- Provide the Username for your SMTP client.
- Enter the Password for your SMTP client.
- Set Is Exchange Online to
Trueif you are using Exchange Online, otherwise set it toFalse. - Set Enable SSL to
Trueto use the SSL protocol for secure communication.
Step 3: Write the Email Content
- Enter the sender's email address in the From field.
- Add recipient email addresses in the To field. You can use a list of strings or variables.
- Enter the email subject in the Subject field.
- Write the email body in the Body field. Use
\nfor new lines. - If you need to, add CC recipients in the CC field. You can use a list of strings or variables.
- If you need to, add BCC recipients in the Bcc field. You can use a list of strings or variables.
- Set Is HTML to
Trueif your email body contains HTML formatting, otherwise set it toFalse. - Set Is Anonymous to
TrueorFalsebased on your server's requirements.
Step 4: Add Attachments (Optional)
- In the Attachment File Path field, provide the full path to the file you want to attach.
- You can use a list of strings or variables containing file paths.
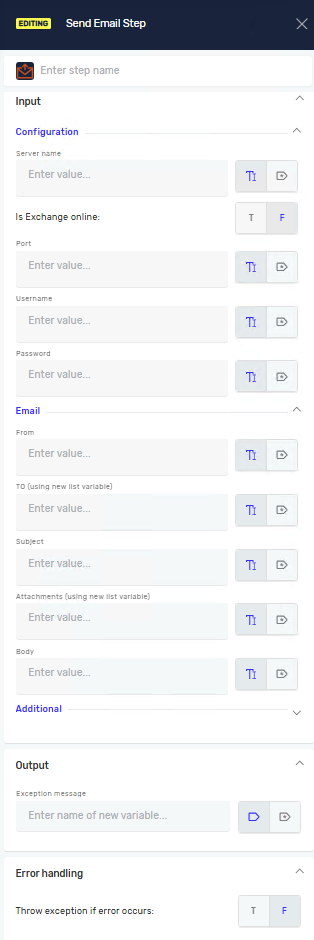
Parameters Explained
Step name (Optional)
- A custom name for this step in the Process Editor.
Server Name (Required)
- The name of your SMTP client.
Is Exchange online (Required)
- Set to
Trueif you are using Exchange Online. - Set to
Falseif you are not (default).
Port (Required)
- The port number for your SMTP server.
Username (Required)
- The username for your SMTP client.
Password (Required)
- The password for your SMTP client.
From (Required)
- The email address the message will be sent from.
To (Required)
- A list of recipient email addresses.
- You can use a list of strings or variables.
Subject (Required)
- The subject line of the email.
Attachment File Path (Optional)
- The full path to the file you want to attach.
- You can use a list of strings or variables.
Body (Required)
- The content of the email message.
- Use
\nto create a new line.
CC (Optional)
- A list of email addresses for carbon copy recipients.
- You can use a list of strings or variables.
Bcc (Optional)
- A list of email addresses for blind carbon copy recipients.
- You can use a list of strings or variables.
Is Anonymous (Required)
- Set to
TrueorFalsebased on your server's anonymous login settings. Falseis the default value.
Is HTML (Required)
- Set to
Trueif the email body contains HTML content. - Set to
Falseif the email body is plain text (default).
Enable SSL (Required)
- Set to
Trueto use the SSL protocol for secure email transmission. - Set to
Falseto turn off SSL (default).
Related Articles
Need Help?
Can't find what you're looking for? Join the Robotiq Community to get help from other users and the Robotiq team.