Try Catch Step
The Try Catch step lets your robot handle errors smoothly. You can mark a part of your process that might fail. If something goes wrong in this section, the robot jumps to an exception block instead of stopping the whole process.
Use this step when a part of your automation might not always work right. For instance, an application might sometimes have a data export option, and other times it might not.
How to Use the Try Catch Step
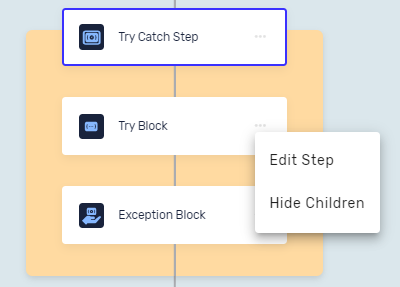
The Try Catch step has two main parts: "Try" and "Catch" (also called "Exception").
Step 1: Add the Try Catch Step
- Open your process in the Robotiq.ai Process Editor.
- Click the (+) button where you want to put the step.
- Pick Try Catch from the list of steps.
Step 2: Set Up the "Try" Block
- Put the steps that might cause an error inside the Try block.
- Click the (+) button inside the Try block to add more steps.
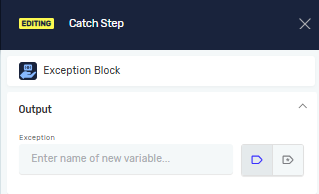
Step 3: Set Up the "Catch" (Exception) Block
- Put the steps you want the robot to run if an error happens in the Try block.
- Click the (+) button inside the Catch block to add more steps.
Important: If an error occurs in the Try block, the robot will skip any steps left in that block and immediately run the steps in the Catch block.
Parameters Explained
Step Name (Optional)
- A custom name for this step in the Process Editor.
- Example:
Export Data with Error Handling - Use this to make your process easier to follow.
Exception (Required)
- A variable where you can save a message about why the process went into the Catch block.
- Example:
errorMessage - Use this to record or show details about the error.
Related Articles
- Group - Robotiq.ai - Learn how to group steps to keep things tidy.
- If Step - Robotiq.ai - See how to run steps based on certain conditions.
- Stop Process Step - Robotiq.ai - Learn how to stop a robot's run.
Need Help?
Can't find what you're looking for? Join the Robotiq Community to get help from other users and the Robotiq team.