Switch Case Step
The Switch Case Step runs a block of code only if its input value matches the variable set in a parent Switch Step. Use this step to set up conditional logic in your automation.
How to Use the Switch Case Step
Add a Switch Case Step to set a specific condition inside a Switch Step. The code in this step runs if the Switch Step's variable matches the Case value you put in.
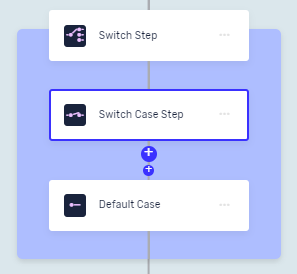
Step 1: Add a Switch Case Step
- In your process, click the + button where you want to add the step.
- Pick Switch Case Step from the list.
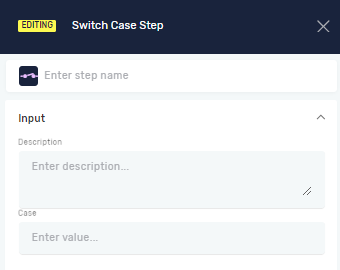
Step 2: Set the Case Value
- In the Case field, type the exact string or integer value.
- This value will be checked against the variable in the parent Switch Step.
Important: You can only type a fixed value here, not a variable. For instance, you can type "this is my case" or 123.
Parameters Explained
Step Name (Optional)
- A custom name for the process step.
- This name shows up on the step box in the editor.
Case (Required)
- The fixed string or integer value that the Switch Step's variable will be checked against.
- Example:
"Success"or1 - Use this to set a specific condition for the code block.
Related Articles
Need Help?
Can't find what you're looking for? Join the Robotiq Community to get help from other users and the Robotiq team.