Excel Rows Loop Step
The Excel Rows Loop Step helps you automate tasks for each row in an Excel file. You can work with a set number of rows or all of them.
How to Use Excel Rows Loop Step
This step makes a loop that runs for every row you pick in an Excel file.
Step 1: Add the Excel Rows Loop Step
- Drag the Excel Rows Loop Step into your process.
- Give the step a custom name if you want. This helps identify it in the editor.
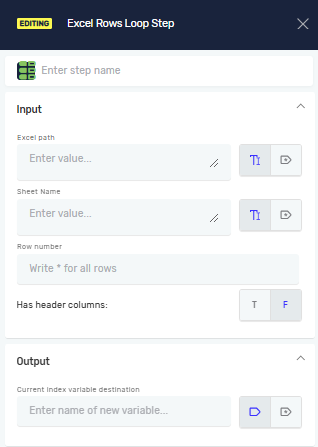
Step 2: Set Up Input Parameters
Set up these options for your Excel file:
Excel Path (Required)
- Type the full path to your Excel file.
- You can use a variable you already have or type the path directly.
Sheet name (Required)
- Type the name of the sheet you want to read.
- You can use a variable you already have or type the name directly.
Row number (Required)
- Say how many rows to read.
- Type a number, or use
*to read every row.
Has header columns (Required)
- Set this to
T(True) if your Excel sheet has header columns. - Set it to
F(False) if your Excel sheet does not have header columns.Fis the default setting.
Step 3: Set Up Output Parameters
Current index variable destination (Required)
- Pick an existing variable or make a new one.
- This variable will hold the number of the current row each time the loop runs.
Related Articles
- Assign Excel Cell Value To Variable Step
- Read Value From Excel File Step
- Write Value To Excel File Step
Need Help?
Can't find what you need? Join the Robotiq Community to get help from other users and the Robotiq team.