Delete Folder Step
The Delete Folder step gets rid of a folder you pick from your system. You can send the folder to the Recycle Bin or delete it for good.
How to Use the Delete Folder Step
Add this step to your process when you need to remove a folder.
Step 1: Add the Delete Folder Step
- Open your process in the Robotiq.ai Process Editor.
- Drag and drop the Delete Folder step into your workflow.
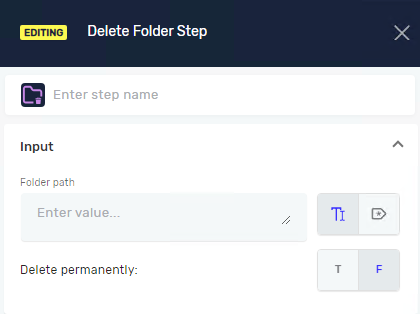
Step 2: Set Up the Folder Path
- Click on the Delete Folder step to open its properties.
- In the Folder path field, type the full path to the folder you want to delete.
- You can use a string variable that holds the folder path.
- You can also type the path directly, for example:
C:\MyDocuments\OldFolder.
Step 3: Pick How to Delete
- In the Delete permanently field, select
TrueorFalse.- Select
Trueto delete the folder for good. It won't go to the Recycle Bin. - Select
Falseto send the folder to the Recycle Bin.
- Select
What the Parameters Mean
Step name (Optional)
- A custom name for this step in your process.
- Example:
Delete Temporary Files - Use this to make your process easier to understand.
Folder path (Required)
- The full path to the folder you want to delete.
- Example:
C:\Users\YourName\Downloads\Temp - You can use a variable that stores the folder path.
Delete permanently (Required)
- This controls if the folder goes to the Recycle Bin or is deleted forever.
True: Deletes the folder without using the Recycle Bin.False: Moves the folder to the Recycle Bin.
Related Articles
- Create Folder Step - Robotiq.ai
- Empty Folder Step - Robotiq.ai
- Folder Exists Step - Robotiq.ai
- Move Copy Folder Step - Robotiq.ai
Need Help?
Can't find what you're looking for? Join the Robotiq Community to get help from other users and the Robotiq team.