Delete Row In Data Table Step
The Delete Row In Data Table step takes out a specific row from a data table variable. You pick the row to delete by its index number. This step helps you clean up data by getting rid of old, repeated, or bad records when you automate things.
How to Delete a Row in a Data Table
Use this step to remove a row from a data table you already have.
Step 1: Add the Delete Row In Data Table Step
- Drag and drop the Delete Row In Data Table step into your workflow.
Step 2: Configure the Step
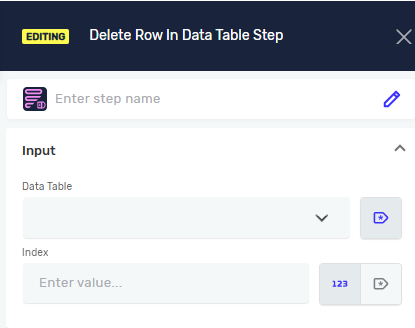
- In the step properties, give the step a custom name in the Step name field (this is optional).
- Choose the data table variable you want to change from the Data Table dropdown.
- Type in the Index number of the row you want to delete.
- The index starts counting from zero. This means the first row is index 0. The second row is index 1, and so on.
Important: This step permanently deletes the row from the data table. Double-check that the index value is correct. If the index is outside the table's range, the step won't work.
Parameters Explained
Data Table (Required)
- This tells the system which data table variable to delete a row from.
- Example:
myDataTable - Use this to pick the right data table.
Index (Required)
- This is the zero-based index number of the row to remove.
- Example:
0(to delete the first row) - Use this to point to the exact row you want to delete.
Common Issues
Problem: The row doesn't get deleted, or the automation stops working. Solution: Check the Index value. Make sure it's a number that exists within your data table's rows. For example, if your table has 5 rows, valid indices are 0, 1, 2, 3, and 4.
Related Articles
- Add Row In Data Table Step
- Delete Column In Data Table Step
- Update Value In Data Table Step
- Write Value To Data Table Step
Need Help?
Can't find what you're looking for? Join the Robotiq Community to get help from other users and the Robotiq team.