
Notifications
We’ve added notifications to help you better track the status of your processes and robots.
Notifications are based on two trigger types:
- Robot events
- Job events
A notification can either:
- send an email
- trigger a webhook
Before using notifications, you must first create them in Settings → Notifications.
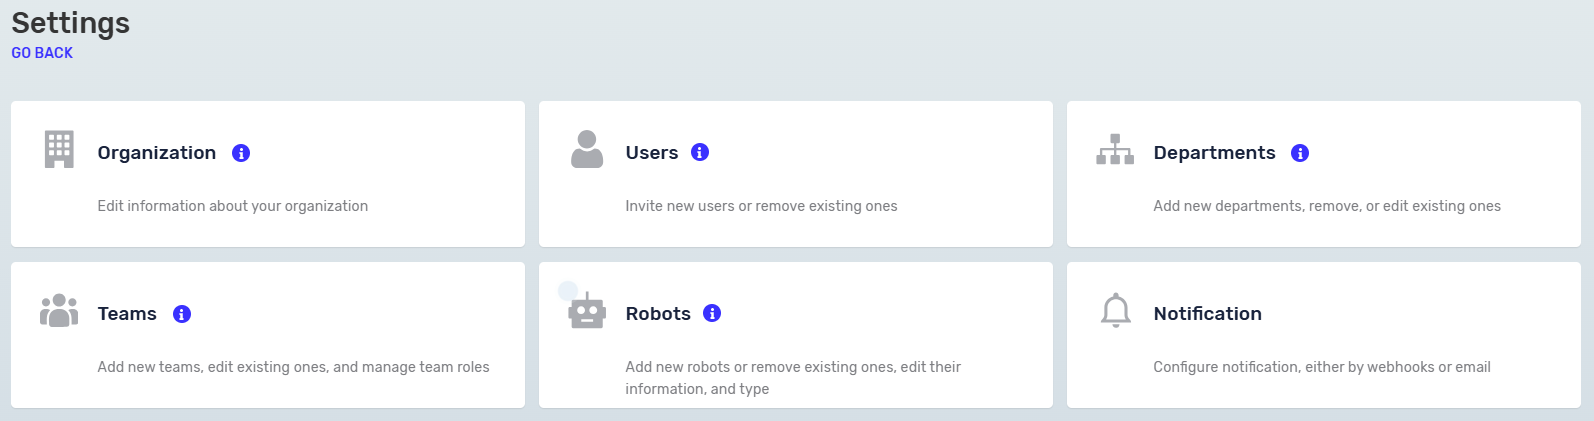
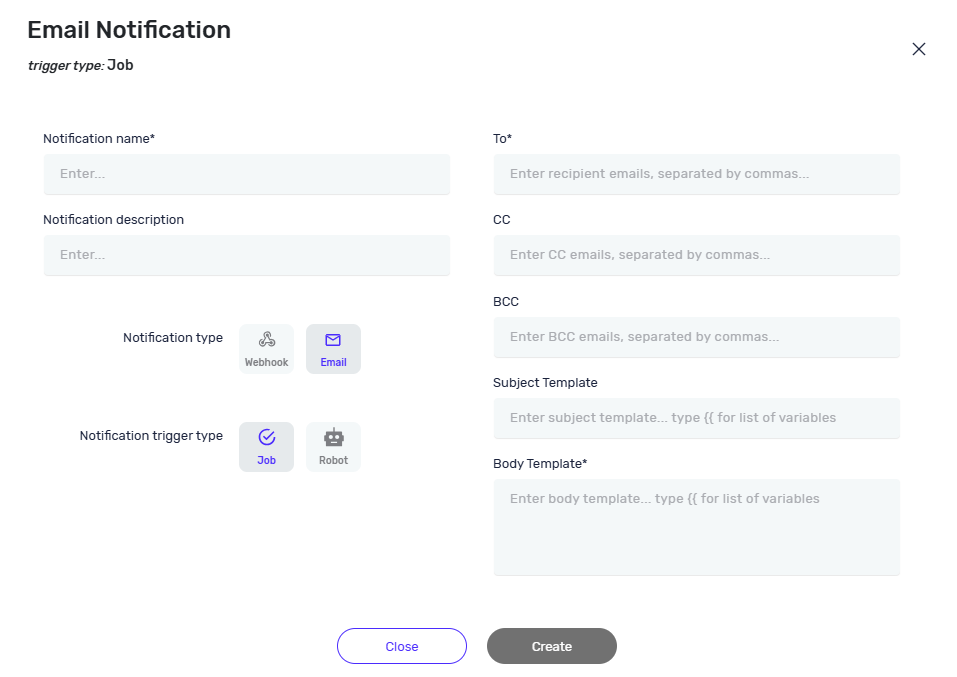
During creation, you define: the notification type (Email or Webhook) and the event type you want to track (Robot or Job).
Fields marked with * are required
For email notifications, you can include dynamic data about the robot or job in the email body.
When typing "{{", a list of all available variables will appear, allowing you to easily insert them into the message.
When the notification is related to a robot, the following variables are available:
RobotId, RobotName, IsConnected, TenantId
When the notification is related to a job, the following variables are available:
JobId, JobName, PreviousStatus, NewStatus, StartTimeLocal, FinishTimeLocal, ExpectedStartTimeLocal, StartTimeUtc, FinishTimeUtc, ExpectedStartTimeUtc, TenantId, TenantName, RobotId, RobotName, ProcessName, ProcessVersionId, ProcessRefId, DepartmentName, DepartmentId, ScheduleId, CanceledDescription
The email subject and body can contain a combination of text and variables, for example:
Process {{ProcessName}} finished with status {{NewStatus}} at {{FinishTimeLocal}}
Webhook
Webhook notifications allow the system to send event information to an external endpoint whenever the selected robot or job event occurs.
When the selected event occurs, the system sends the configured JSON payload to the specified endpoint using the selected HTTP method and authentication settings.
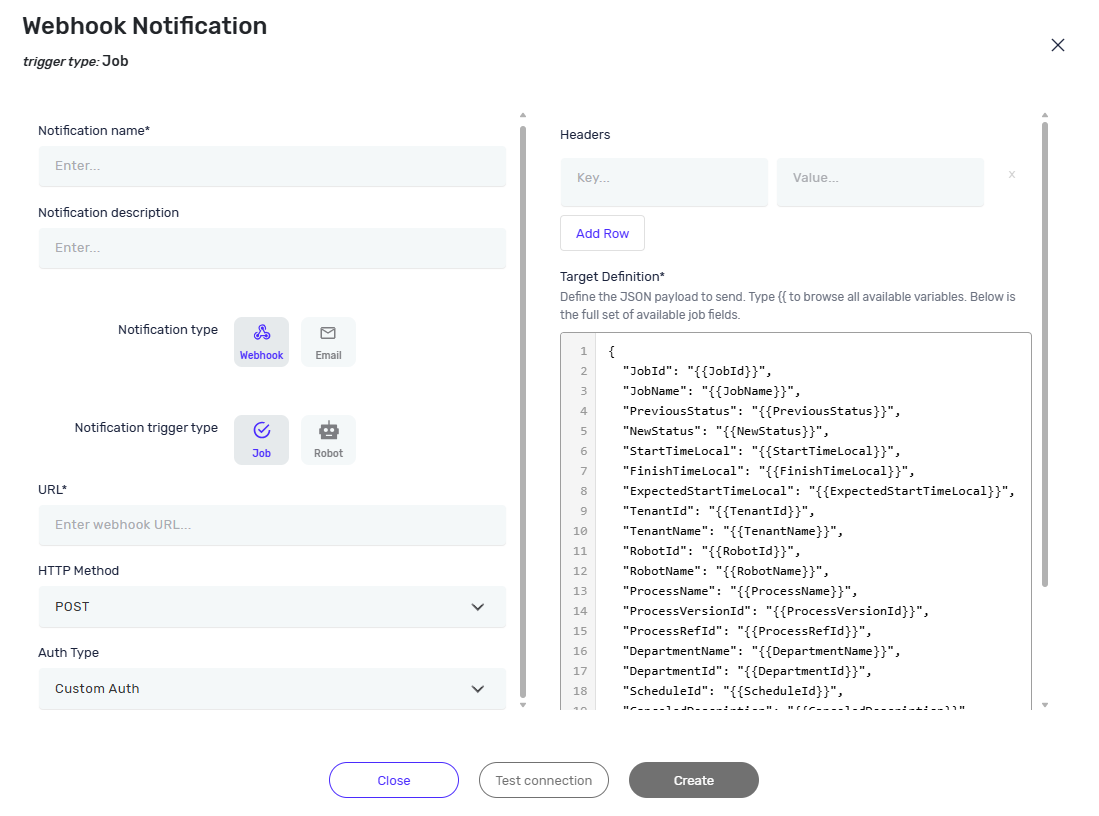
To configure a webhook notification, provide the following information:
| URL | The endpoint that will receive the webhook request |
| HTTP Method | The HTTP method used to send the request |
| Authentication | The authentication method used when calling the endpoint |
| Headers | Optional custom HTTP headers that will be included in the request |
| Target Definition | A valid JSON payload containing the data to be sent |
Authentication
Webhook notifications support two authentication methods: Custom Authentication and OAuth 2.0 Client Credentials.
Custom Authentication
Custom Authentication allows you to define one or more HTTP headers that will be included in every webhook request.
For each header, specify a key and value.
OAuth 2.0 Client Credentials
OAuth 2.0 Client Credentials authentication is intended for APIs that require an access token. Before sending the webhook notification, the system requests an access token from the configured token endpoint. Once the token is obtained, it is automatically included in the webhook request using the Authorization header.
If all authentication fields are left empty, the authentication configuration will be ignored and the webhook request will be processed as if no authentication method was configured.
Custom headers can be added to include additional information in the webhook request.
Assigning Robot Notifications
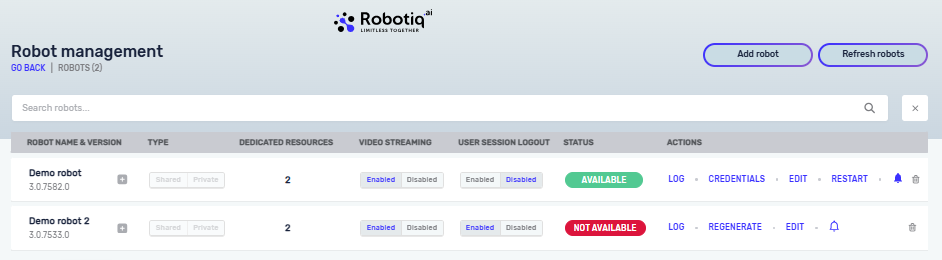
Robot notifications are configured on a per-robot basis. To configure a notification, open the Robot management and navigate to the Notify icon. From there, select the notification type (Email or Webhook), choose the notification you created, and then select the robot event you want to track.

When the Notify icon is highlighted in blue, it indicates that a notification is already configured for that robot.
Assigning Job Notifications
To add a notification for a job, use the Notify icon within the existing schedule to create or edit the notification. Notifications for jobs are configured at the schedule level. When the Notify icon is highlighted in blue, it indicates that a notification is already configured for that Schedule.

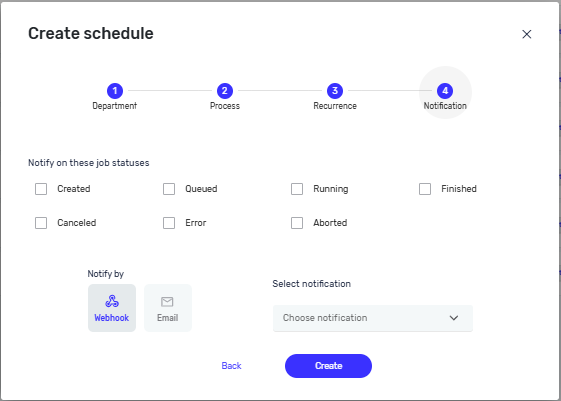
When creating a new schedule, the option to add a notification is available as Step 4 in the scheduler setup. This step is optional and allows you to define how and when you want to be notified about job events.
Notifications can also be assigned when creating an immediate job
Notification Timing
Job notifications are sent almost immediately after a job status change.
Robot notifications are delayed by approximately 7 minutes to avoid unnecessary alerts caused by short-lived interruptions. The notification is only sent if the robot remains in the changed state after this period.
Deleting Notifications
A notification cannot be deleted if it is currently assigned to a robot or a schedule. To delete it, you must first remove it from all assigned robots and schedules.
Need Help?
Can't find what you're looking for? Join the Robotiq Community to get help from other users and the Robotiq team.